

Aaaaand we’re back!
In the thrilling part 1 to this post, I said we’d look at how to add the slit detail on the hem that mimics the inspo outfit.

I’m not doing a dramatic slit, but I am doing two shorter ones! To do this, I folded the skirt front in half (so I’d get two even slits on both thighs). Then I followed straight to the end of the waistline dart all the way down to the hem, where I then cut a straight line about 4 inches up.

Then I made a facing.
A facing is a strip of fabric that will be sewn to the right side of the fabric, and then flipped to the wrong side so that you have a clean, fray-free seam.
I cut out a small piece of fabric long enough to cover the length of the slit with about an inch for seam allowance around the entire slit. In retrospect, I could have cut the slit after making the seam, but… I didn’t. Don’t worry, it still worked out just fine, I just had to make sure I kept the slit closed while sewing.
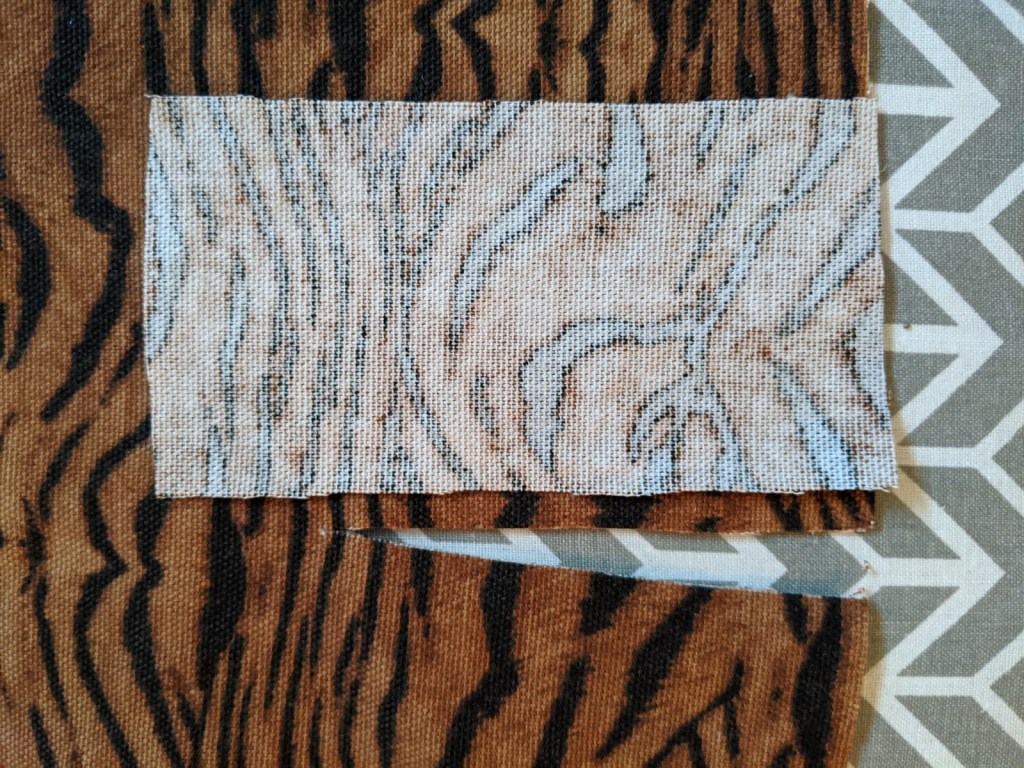
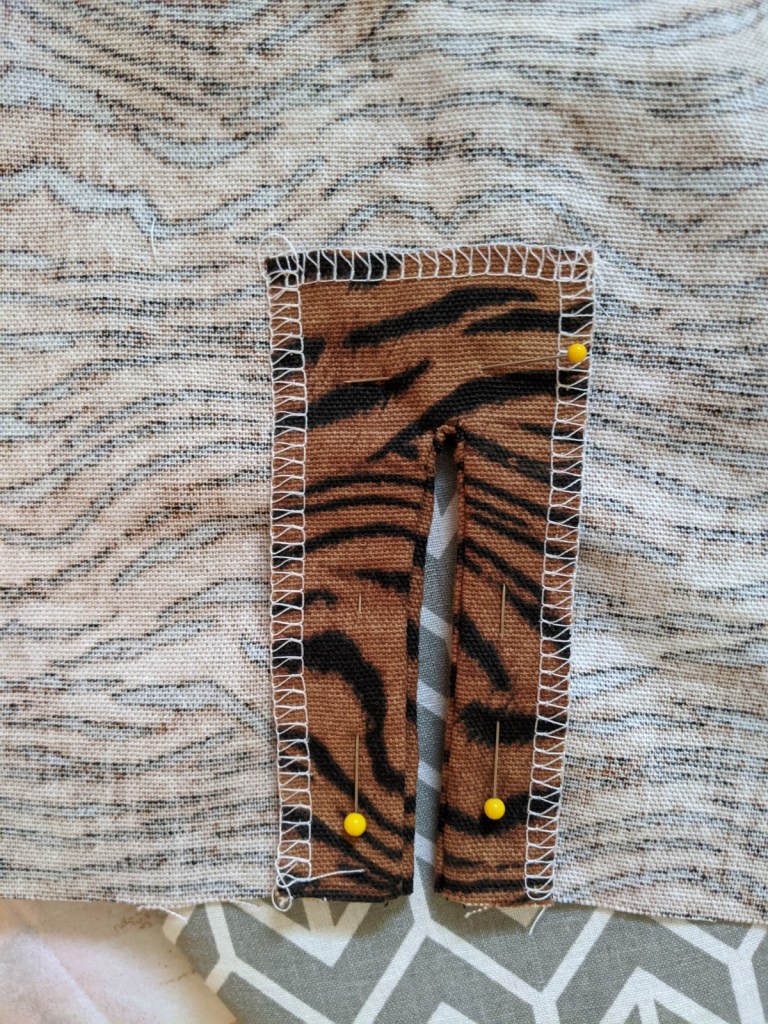
To make sure there wouldn’t be any unravelling from the facing, I serged the edges. Then, you simply lay right sides together and pin.

Now, sew all the way around the slit. I sewed really close to the slit, but if you want to sew further away so that you have a stronger seam, that is absolutely okay. It won’t make your slit look weird!
Once sewn, cut the slit into the facing! Like I said earlier, I could have probably cut the skirt and the facing slit at the same time to save myself a step, but it worked out just the same.

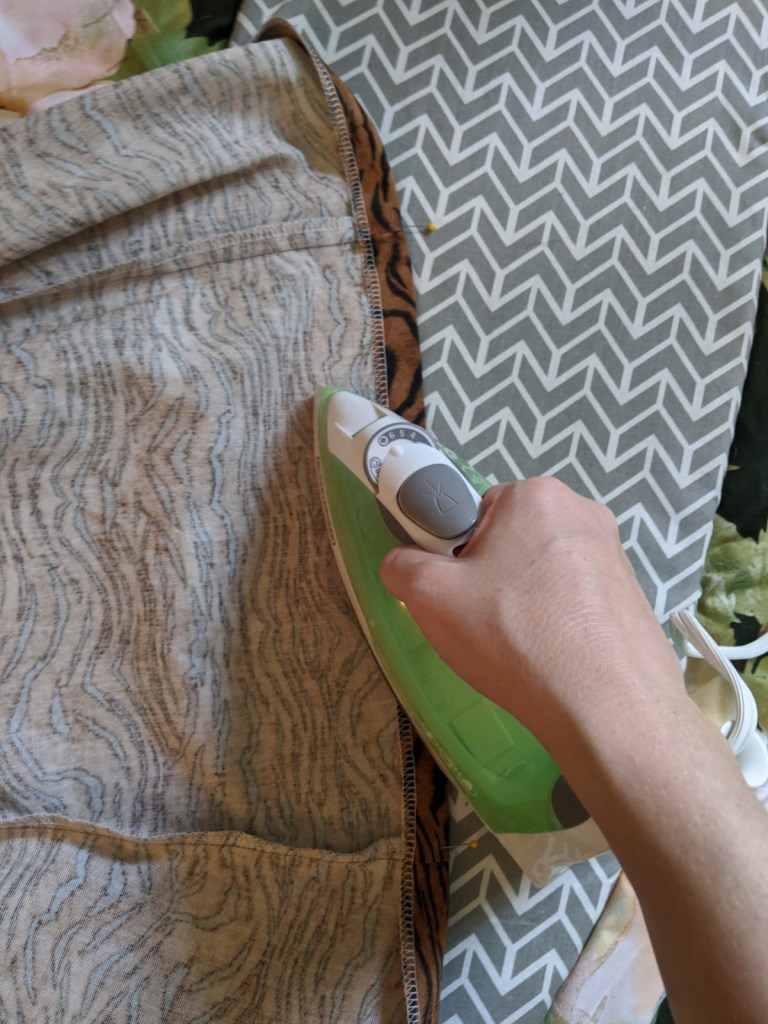
When you get to this part, rejoice! The worst is over! Now we only have to turn the facing to the wrong side of the fabric. This will take some finagling to get it flat, and then you will need to iron it to make sure it stays unwrinkly (for lack of a better word).
I remember learning about facings in college and feeling like 🤯
You could do anything with a facing! Aside from slits, you could make scalloped & zig-zag hems, or keyhole cut-outs in any shape, and all sortsa collars. It was so exciting to discover of all the ways you could play with your projects.
But back to this project! The only things left are to iron and stitch the hem, and finish up the waistband. You’ll have to trust me on the waist band, because I didn’t get a picture of that. I take the pics on my phone and upload them to Drive so I can delete them and try to conserve some of my phone’s battery. This means if I have an ‘incomplete upload’ and the pictures are already deleted off my phone, I don’t have them to share on this blog anymore! So much for efficiency hahaha.
I did get the hem though…
Where the slits were required a bit more creative ironing, because I didn’t want any of the edges to show the fabric doubled over itself. You have to make mitered edges to give it a smooth look. I found 2 handy images to help illustrate what to do to make a mitered edge, in case you’re wondering:
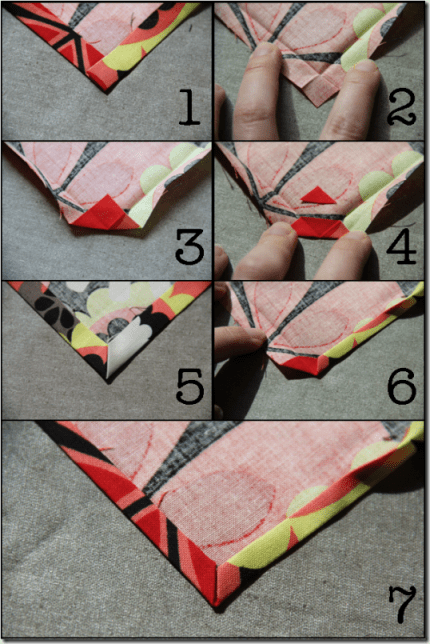
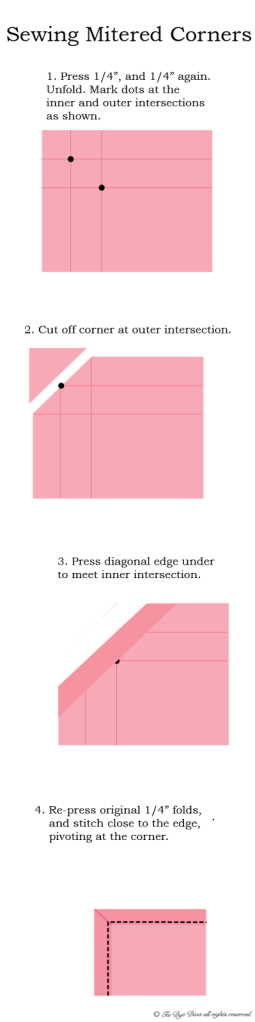
I didn’t do it as mathematically perfect as many websites will tell you, but I eyeballed it to my liking and then ironed it in place.

The penultimate step in this process was to stitch the whole hem down at 1″, even around the slits (again, thank you ‘incomplete upload’ for losing that image). The Drive salvaged this gem though!
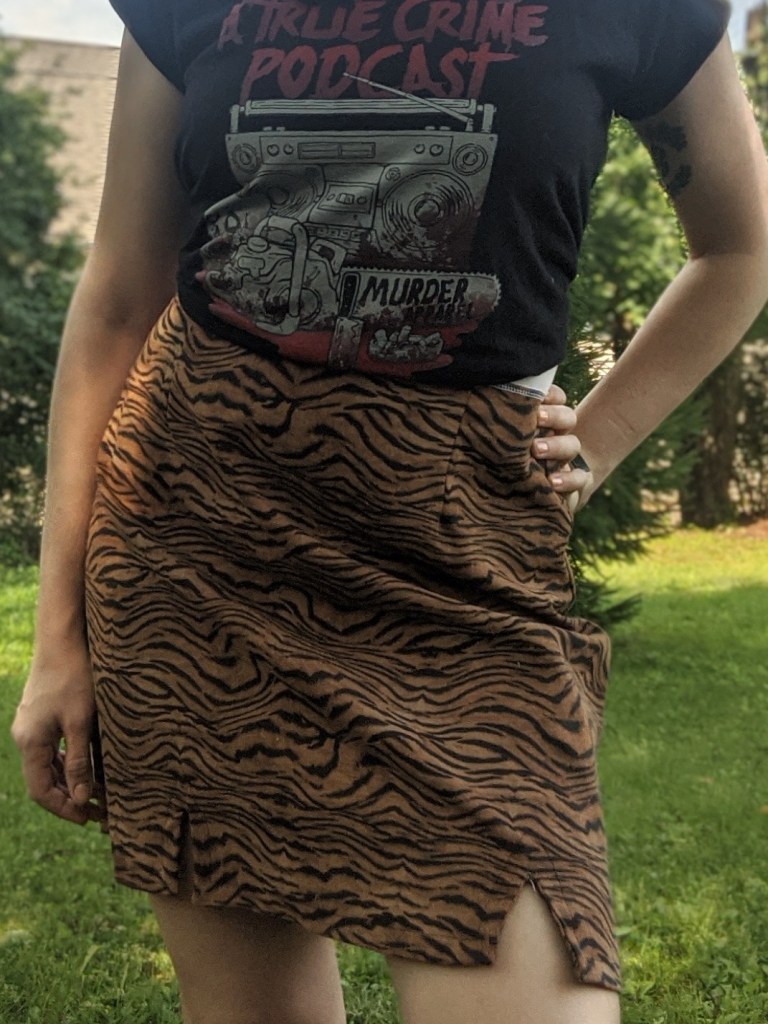
So what’s the ultimate step in this journey? The photo-shoot of course!
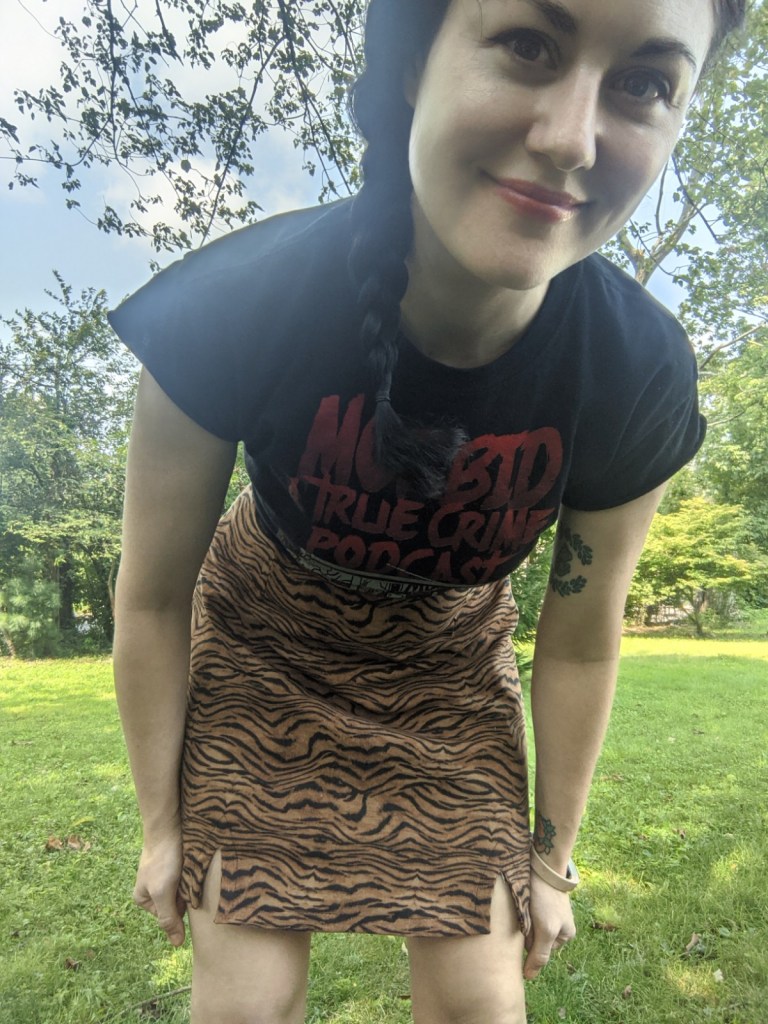
So how do you like the slits? They’re much more modest compared to the inspiration outfit, but I like it that way.
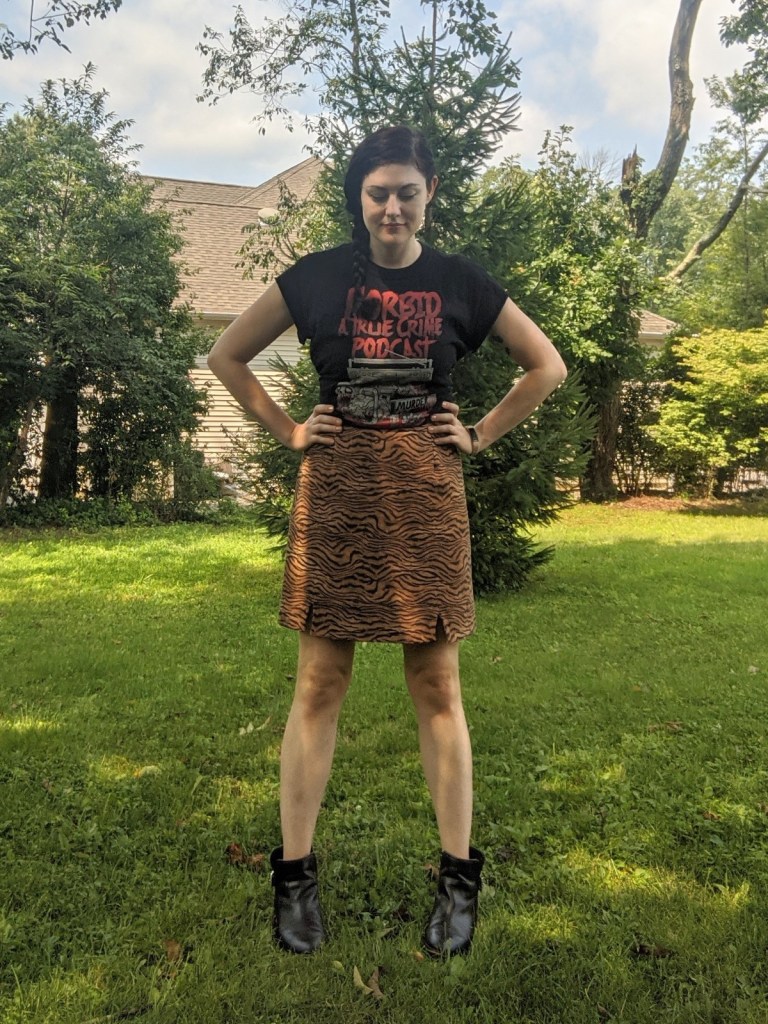
I paired it with a top I got from Murder Apparel that celebrates one of my favorite podcasts, Morbid, and some boots I got at T.J. Maxx about 5 years ago (I keep my shoes nice for the long run).
So that’s it, what do we think? Working from scratch is always way more work, but you do have more control over the final end product. I’m pleased with it myself, and I hope I’ve inspired you to modify your patterns and try new fashion vibes. Til next time!
~Madeleine
